Best Controller Settings in eFootball 2026 – eFootball
Camera angles, assist levels, and button layouts top players use. Optimize defense, passing, and shooting fast in eFootball 2026.
Table of Contents
You want controller settings in eFootball 2026 that feel sharp without costing control, and it starts with the joystick: movable over fixed, narrow-to-medium width for quick flicks and cleaner skill chains. Dial sensitivity near 60% with about a 10% dead zone, then trim diagonal inputs slightly to reduce stray passes. Keep sprint responsive but not twitchy. Pair this with Semi pass assist and Manual first-touch. Now, here’s where most players still slip…
Key Takeaways
- Use a movable joystick post-2026 for highest responsiveness; set width to medium for balance, narrow for snap turns, wide for steadier shielding.
- Set horizontal/vertical sensitivity around 60% (55–70% range); dead zone near 10% to prevent drift while keeping micro-touch control.
- Keep sprint/brake sensitivity at 45–55%; dash in 1–2 second bursts, spacing bursts every 6–8 seconds to preserve stamina.
- Pass Assistance on Semi, Shot Power 60–75%, low–medium aim sensitivity (20–40%); Manual crossing for fullbacks, higher tackling assistance for CDMs.
- Use Tele Broadcast with 20–22 zoom and 3–4 elevation; reduce vibration to 10–20% for steadier flicks and improved input accuracy.
Choosing Between Fixed, Movable, and Off Joystick
Before you lock in a joystick type, test all three across at least 30 matches to feel how they change your touch and reaction time. You’ll spot differences in first touch quality, responsiveness, and error rate only over a meaningful sample.
Start with movable. Post-2026, it’s the most responsive, helping you snap into skill moves and adjust direction quickly when breaking lines or escaping pressure. If you want steadier inputs and prioritize accuracy over quick flicks, try fixed. It smooths your lanes but slows rapid direction changes. If you rely on button-only play and prefer a clean screen, go off; you’ll gain visibility while leaning on assisted movement.
After testing, pick the type that best matches your comfort with reacting, shielding, and timing skill chains.
Narrow, Medium, or Wide Joystick Width
Dial in your joystick width by matching responsiveness to your playstyle: go narrow for snap turns and sharp diagonals when you spam feints and rapid direction shifts, pick wide for steadier inputs that help you shield and place touches under pressure, or stick with medium for a balanced feel.
Start with a movable joystick and test narrow, medium, and wide across roughly 30 matches. If you thrive on rapid skill chains—angular inputs, quick rotates, back drags, and stop‑and‑go bursts—choose narrow for instant cuts and explosive angle changes. If you value control in congested areas, pick wide to slow inputs slightly and place touches precisely while protecting possession. Prefer flexibility? Go medium for predictable transitions without extreme trade‑offs. Use dash sparingly; let your joystick timing create separation.
Sensitivity and Dead Zone Tuning
Start by locking in a baseline that balances snap and stability: set horizontal and vertical sensitivity around 60% (keep it between 55–70%) and pair it with a 10% analog dead zone (safe range: 8–12%) to kill drift without dulling micro‑touches. This combo keeps turns sharp while preserving precise aiming for passes and shots.
Trim sprint/brake sensitivity to 45–55% so you don’t overshoot tackles or lose control during abrupt decelerations. If you use a movable joystick, drop diagonal sensitivity roughly 5% below your main value to prevent accidental angular inputs during fast changes of direction.
After any tweak, play at least 10 online matches. Adjust in 2–3% steps until inputs feel predictable under pressure. Record settings, revisit weekly, and fine‑tune as your playstyle evolves.
Dash Usage Strategy and Stamina Management
With your sensitivities set, the next edge comes from treating dash like a scalpel, not a hammer. Use it sparingly: in traffic, holding dash beyond 2–3 seconds kills ball control and invites turnovers. Fire 1–2 second bursts only when you’ve created separation or see a clear lane.
Time it off a stop‑and‑go: double‑tap and hold to halt, push forward, then tap dash about 0.2–0.4 seconds later for a sharp acceleration that slips most tackles. When tightly marked, release dash and rely on precise joystick control to stabilize touches and save stamina.
Manage your energy by spacing those short bursts every 6–8 seconds. You’ll preserve legs for late presses and counters. After circular slowdowns or a back‑drag, add a brief dash to capitalize without draining reserves.
Mastering Angular Inputs and Circular Rotations
Cut through pressure by leaning on two core inputs: angular flicks and circular rotations. Diagonal flicks at a precise 45° trigger sharper direction changes than straight pushes, letting you slip past shoulder charges. For safety under tight marking, rotate the stick in a smooth 270–360° arc (or pull back, then rotate once). This creates a 0.3–0.5s pocket of space without risky flair. Chain an angle flick, wait 0.1s, then tap dash for a cleaner burst than dashing first.
- Practice 30+ matches to map timing across narrow, medium, and wide stick responses.
- Use narrow for quickest angular flicks; switch to medium/wide when you need placement accuracy.
- Rotate under hard press to lower turnover risk.
- Angle flick → 0.1s → dash to evade tackles.
Back Drags and Stop-and-Go for Space Creation
Slip past tight markers by pairing back drags with crisp stop-and-go timing. Execute a back drag by flicking the joystick backward while sprinting, then immediately push it toward your escape lane. You’ll earn a 0.3–0.6s gap that frees your next touch or pass. Combine it with minimal dash: release sprint during the flick to keep tight control and cut turnovers.
Use stop-and-go when pressure crowds you or a defender charges. Double-tap and hold to stop on reception, then push forward just before they commit—about 0.2–0.4s—to trigger a burst that beats the first line. The burst is short and straight, so plan your exit route.
Drill both moves for 5–10 minutes against medium-to-high AI pressure to nail timing and reduce input errors.
First Touch and Pass Assistance Settings
Those back drags and stop‑and‑go bursts work best when your control settings match your risk tolerance. Set First Touch Assistance to Manual if you want full control and realism; you’ll absorb pressure with skilled cushioning and directional nudges. If turnovers spike under press, switch to Semi for a 30–50% safety net. Keep Pass Assistance at Semi as your baseline—trajectory help without losing intent on through balls and driven passes. Prefer safer possession in tight midfields? Go Full, knowing you’ll sacrifice precision on chips and threaded passes. For competitive play, pair Manual First Touch with Semi Pass to reward technique and reduce cheap giveaways. Reassess after 20–30 matches and adjust one notch if first touches or passes keep failing.
- Manual Touch: maximum control
- Semi Touch: safety under pressure
- Semi Pass: balanced corrections
- Full Pass: safer, less precise
Shot Power, Aim, and Curve Controls
Why start by dialing in power, aim, and curve before anything else? Because these three decide whether your shots fly, slice, or nestle in the corner. Set Shot Power to medium-high—about 60–75%. You’ll keep placement while unlocking distance; push higher only if you’re hunting long-range screamers and can handle reduced precision.
Keep Aim sensitivity low-to-medium, around 20–40%, so tiny stick nudges translate to accurate targets without jitter. Enable Curve control and set intensity to 30–50% for predictable swerve on free kicks and finesse shots.
For placed curlers outside the box, pair a slightly higher Curve with lower Aim to bend confidently while holding your line. Run 10–20 shooting drills, then tweak: Shot Power in 5% steps, Aim/Curve by 5–10% until volleys and frees feel repeatable.
Defensive Controls: Jockeying, Pressing, and Tackling
Before you chase the ball, lock in control: switch to the movable joystick and set defensive assistance to Manual so you can jockey with intent. Hold L2/LT to face the ball and slide the left stick to manage space; keep 1–2 player lengths to block lanes without diving in. Use R1/RB contain sparingly—press only when the carrier is within 10–15 meters and a teammate can help. Time poke/standing tackles with quick taps; slide only as a last resort or when momentum is neutralized, especially in the box. If dribbles beat you, lower intercept and tackle intensity to curb overcommit. Versus slower AI, raise them slightly to invite more interceptions.
- L2/LT jockey; left stick controls distance
- Maintain 1–2 lengths spacing
- Use R1/RB contain selectively
- Prefer timed pokes over slides
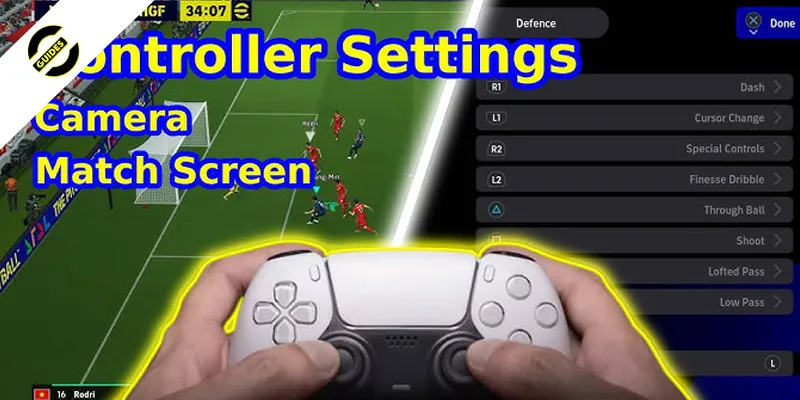
Camera, Vibration, and Accessibility Tweaks
Even with perfect mechanics, your view and feel settings decide how cleanly you execute. Set Camera to Tele Broadcast, or manually use 20–22 zoom with 3–4 elevation. You’ll see more width, teammate runs, and incoming presses sooner, which sharpens build-up and counter defense. If you miss cues, bump elevation to 4.
Turn Vibration off or drop it to 10–20%. Lower rumble cuts hand fatigue and steadies quick flicks and angular joystick inputs for skill moves and stop–start bursts.
Enable High Contrast or colorblind modes if kits or the ball blend in; expect roughly 30% better ball visibility in traffic. Activate Input Assistance for passes/shots on low or medium to keep intent while avoiding wild misses. Add Subtitles/Audio Cues and visual replay markers for off-ball awareness.
Custom Profiles for Positions and Playstyles
With your view and feedback tuned, lock in controller profiles that match roles and game plans. For strikers, pick a narrow movable joystick, dash sensitivity near 70%, and keep shot assistance on to snap into space and finish cleanly. Central midfielders play best with a medium movable joystick, dash around 50%, and through-pass assistance for balanced retention and incisive distribution. Fullbacks and wingbacks need a wide movable joystick, 30–40% dash, and manual crossing to shape deliveries under pressure. Defensive midfielders thrive on a wide fixed joystick, 20–25% dash, and higher tackling assistance to hold shape and win second balls. For possession teams, build a medium joystick profile, low or off dash, smooth circular movement, and pass-first logic.
- Save role-based presets
- Tie profiles to formations
- Train muscle memory in drills
- Review match telemetry
Frequently Asked Questions
How Do Controller Settings Affect Latency in Online Matches?
They don’t change network latency, but they change how you perceive it. You’ll feel delay less with a movable joystick, medium width, and minimal dashing. Favor smooth angular inputs and quick releases to mask jitter and stutter.
What Settings Reduce Accidental Skill Moves Trigger?
Use a movable joystick with medium width, lower skill sensitivity, and shorten double-tap windows. Disable gesture shortcuts, map skills to a dedicated modifier, and reduce deadzone drift by recalibrating. Avoid constant dash; rely on deliberate angular inputs to prevent unintended skills.
Can I Sync Settings Across Devices and Platforms?
Yes, you can sync settings if you’re signed into the same Konami/PSN/Xbox/Steam account and enable cloud save. Use in-game data sync or platform cloud. Cross-platform carries over only account-linked presets, not console-specific mappings.
How Do Adaptive Triggers Impact Injury Risk and Fatigue?
They don’t directly cause injuries, but they nudge you to manage stamina smarter. Heavier resistance signals fatigue, encourages rests, and curbs over-sprinting. Use it as feedback: rotate players, ease off dash, and time bursts to reduce in-game fatigue.
What Settings Are Best for Penalty Shootouts Specifically?
Use movable joystick, medium width, and disable constant dash. You’ll feather power with short presses, aim with subtle angular inputs, and add slight curve using circular rotations. Turn off adaptive triggers, reduce vibration, and practice stop‑and‑go to steady nerves.
Conclusion
You’ve now got a balanced setup that keeps you responsive without losing control. Stick with a movable narrow-to-medium stick, tuned sensitivities, and a small dead zone so you can flick, turn, and pass with precision. Use dash wisely to protect stamina, smooth your diagonals, and trust Semi pass with Manual first-touch. Keep the Tele Broadcast camera consistent, tone down vibration, and save role-based profiles. Practice these inputs, and you’ll feel sharper, steadier, and deadlier in every match.

Analyst. Tactician. Content creator. Since 2023, Amin has been breaking down the eFootball meta—covering Tactics, Dream Team, Player Builds, and Rewards & Coins—to help players climb ranked with data-driven, practical guides.
Related Blog Posts